
Knowledge base
Use the knowledge base feature to create FAQ pages or help pages.
Each separate page is called a knowledge article.
You can show these knowledge articles in the chat widget.
Users can click on these articles and do self-service.
Creating Knowledge Articles:
- To create any article first have at least one category created for the knowledge base
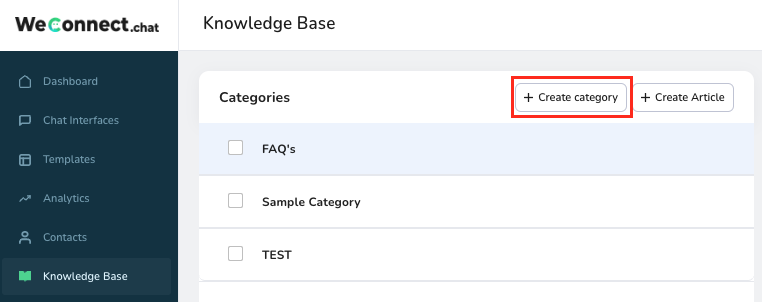
- To create a category, go to –> “Knowledge Base” from the navigation bar
- Click on create category – Enter category name, Save
- Category is now created and available in the category list.
- Now to create an article, click on “Create Article”
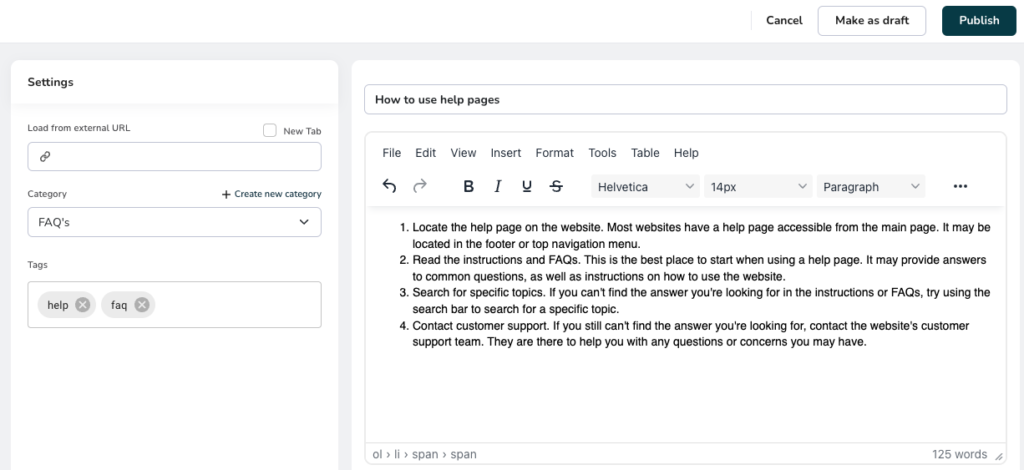
- This will show you the create article page. Enter the required details:
- Select a category for the article
- Create tags, these tags will be useful to search for an article by users using related keywords
- Enter the title of the article – e.g., “How to use help pages”
- Finally write a description of the article. Use the text editor given to format the content as per requirement.
- Use the “Insert” menu of the editor if you want to insert an image, video, hyperlink, etc.
- Use various formatting options given to format the content like font, font style, font size, lists, alignment, text colors, etc.
- Once the content is ready, you can “Publish” the article using the button “Publish”
- If the content is not ready you can save content and publish later using the button “make as draft”
- Use “cancel” if you do not wish to save anything
- Once an article is saved as a draft or published it will be available in the list under each category.
Using external webpage as an article content
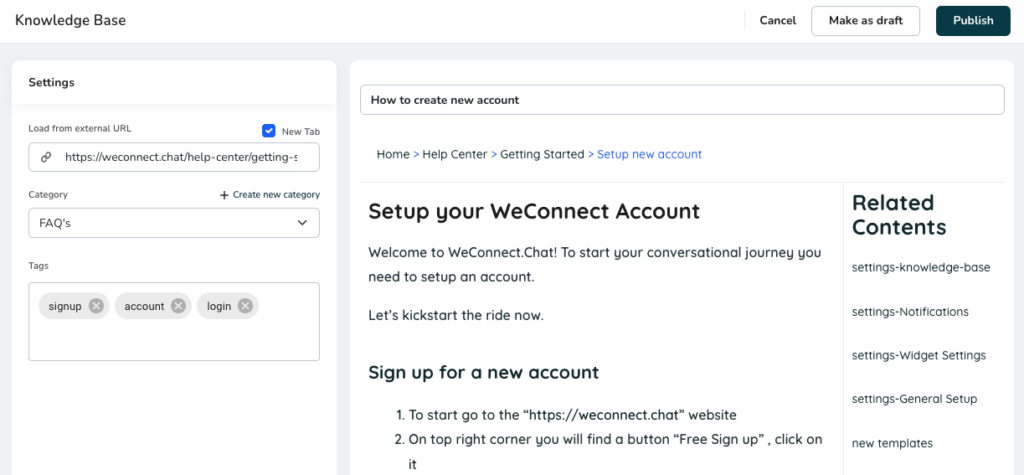
- It is also possible to create an article and load the content from an external web page.
- Refer screenshot below, the content is loaded from an external webpage URL
- To do this, simply copy and paste the external URL in the field “Load from external URL”
- You will instantly see the preview of the external web page when you insert the full URL in the field.
- If you want to open an external web page in a new tab, check “new tab” if you want to open the webpage inside the widget itself, uncheck the “new tab”
- Finally, Publish the article to use inside the chat widget
Adding knowledge articles to the chat widget:
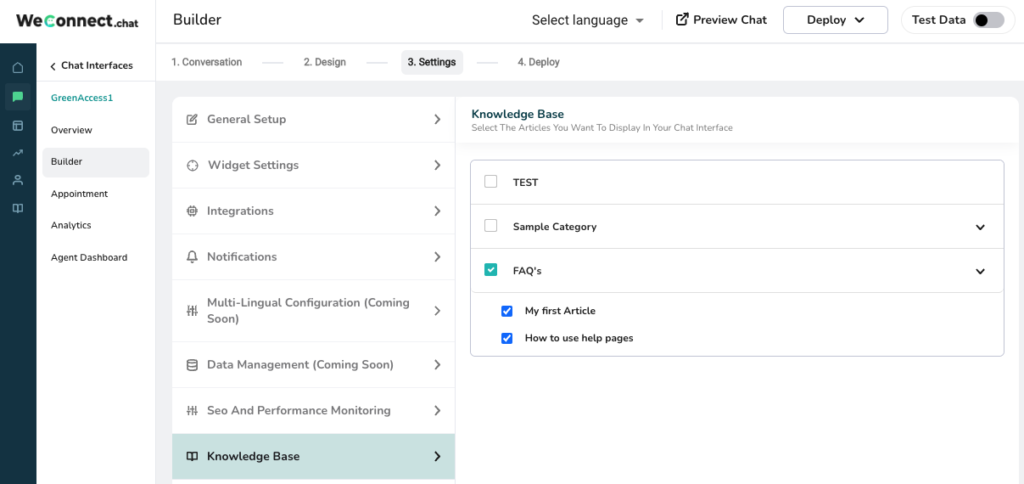
- Go to the chat interface where you want to show the knowledge base
- Go to Builder – Settings – Knowledge Base
- Select knowledge articles from the list which you want to show inside the chat widget
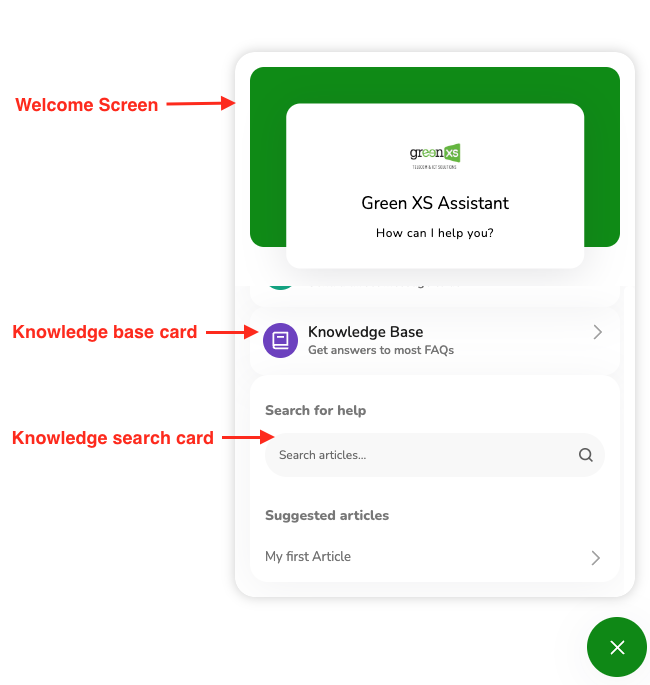
- Now, to enable the knowledge base card go to Builder – Settings – Widget settings
- Pre-requisite to show the knowledge base is the “Welcome screen”, Scroll down to enable the welcome screen
- To show the search articles card, enable “Search for help”. You can change labels as necessary.
- To show the Knowledge base card, enable “knowledge base card”. You can update the title and description of the card as necessary. Also, you can adjust the color of the knowledge base card icon.
- Save Widget settings, your output will look like below
Logical Jump
Now you can add conditions to the user’s response. Using logical jump, you can drive the conversations based on responses given by visitors.
This will help make chat conversations more interesting and meaningful.
Let’s see how this can work and how to configure this.
For example;
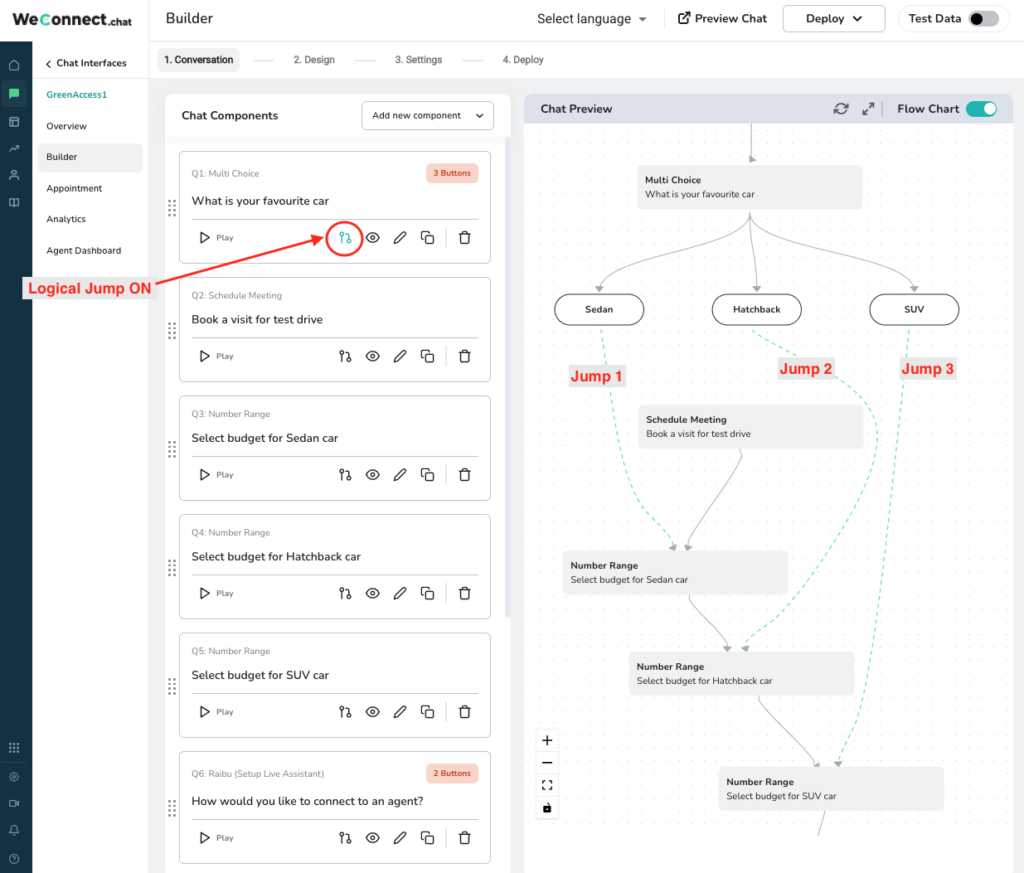
In the below chat conversation, 3 options are given to choose a favorite car. Based on the answer, the budget for the respective car will be asked.
If the response is – Sedan, it will ask “Select a budget for a Sedan car”
If the response is – Hatchback, it will ask “Select a budget for a Hatchback car”

Now,
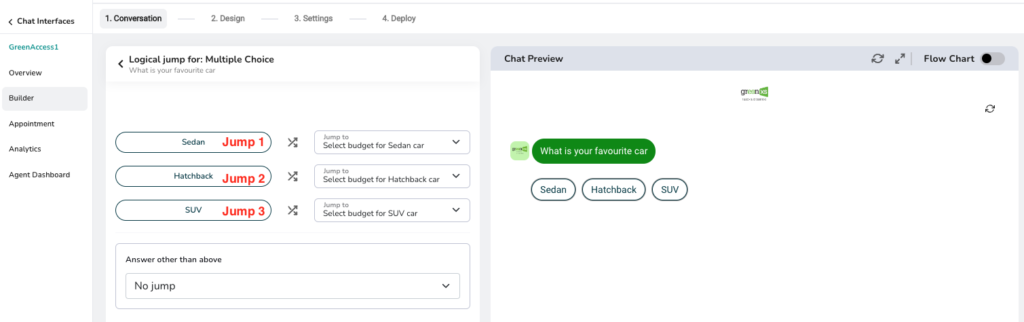
- To configure a logical jump for the above example, you can go to a component where the jump is required.
- Select the Logical jump icon to select jumps for each response.
- Create a pair of response and jump to –> Component (Select jump to component from the dropdown list)
- Finally, save the settings and test the jump for conversation flow
Live Chat / Video Chat
This feature allows you to use live text chat and live video chat in real-time.
To configure this component refer below link.
Human takeover
This is a very interesting feature, it allows the support agents to take control of the chat and offer instant live chat to a visitor.
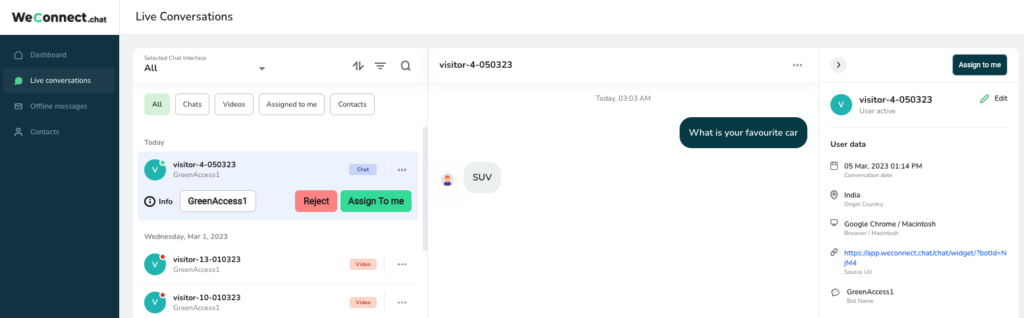
How this works:
- When the visitor starts the interaction with the chat interface an incoming notification received by agents
- Agents can open the chat and see the visitor’s conversation in real-time
- Agents can choose to assign themselves to the chat conversation
- Once the agent does “Assign to me”, visitors gets the message “Agent has taken over this conversation” (This is the configurable message)
- Agent can further continue the chat or can also offer the video chat to the visitor
Now, how to configure Human takeover messages:
Keep a note, the human takeover is activated by default for each chat interface when the “Live chat / human takeover” component is added to the conversation flow.
Additionally, it is possible to configure human takeover for each chat interface separately.
To do this configuration;
- Go to Settings – Setup Human Takeover
- Edit the takeover message and video link message by using the edit icon for each chat interface
- Takeover message – This message is shown to the visitor when the agent starts the Human takeover
- Video Link message – This message is shown to the visitor when Agent offers the “video chat” after initiating human takeover.

Flowchart
The flowchart gives a visual representation of your conversation flow.
You can see the flowchart of your conversation in builder by using the Toggle switch to show the flowchart
This helps you while building chat conversations. Especially when you have the logical jumps enable it is handy to know what will happen next based on visitors’ responses.
Example;
Refer to the image where you can see the components on the left side and the graphical flowchart on the right side.
Also, it is easy to identify what will happen on the logical jump.
Appointment schedular
- This is an important feature, it allows you to show the calendar to visitors so they can schedule an appointment or meeting.
- Once appointments are booked, a video link is generated instantly and mail is sent to the visitor on provided mail ID while creating an appointment.
- Agents can initiate the appointment on a given date/time.
- Agents will be able to see the upcoming appointments on their dashboard.
- To know more details on how to configure, click here.
Welcome message prompts
This is very useful in getting the attention of the visitors to open the chat interface.
Welcome messages generally appear along with the Widget launcher.
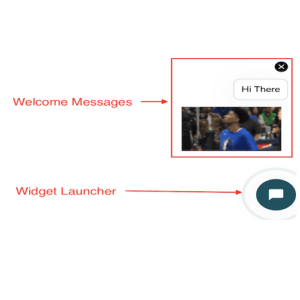
To know more about the widget launcher and how to configure welcome messages, click here.
Multi-lingual chat
This will allow you to configure chat interfaces with multiple languages.
Once this is done, it is possible to target the visitors based on their current location and show the chat interface in the respective language only.
This is currently under development, stay tuned.