Configuration steps:
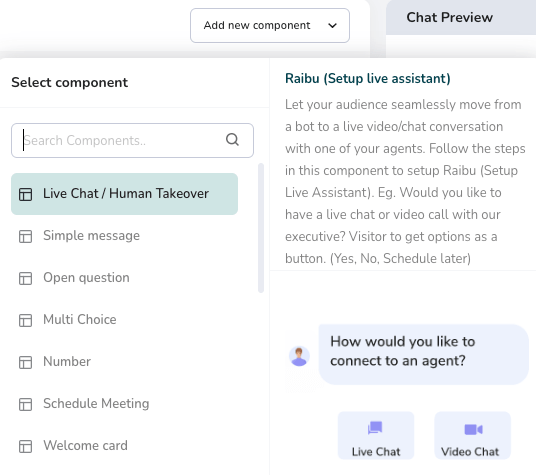
- Let’s start with adding the component to the conversation flow
- You need to be inside Builder –> Conversation
- Click on “Add new component” –> Select “Live chat / Human takeover”
- This will show the component configurations to be setup
Step 1:

- Check the options you want to use.
- Check Live chat for using only Text chat with the agent
- Check Video chat for using only Video chat with the agent
- Check both to use Text and Video chat
- Format the button name and button style as per your need or you can continue with the default label
Step 2: Setup Live Assistant
- Setup various messages to be used to inform visitors during the chat conversation
- Welcome Message: Displayed to the visitor once they request live / video chat
- Offline Message: Displayed to the visitor if Agents are offline or did not answer the request
- Takeover Message: Displayed to the visitor if the Agent starts the human takeover
- Video Chat Message: Displayed to the visitor once the Video chat request is accepted by an agent
- Assigned Message: Displayed to the visitor on accepting live chat request by the agent
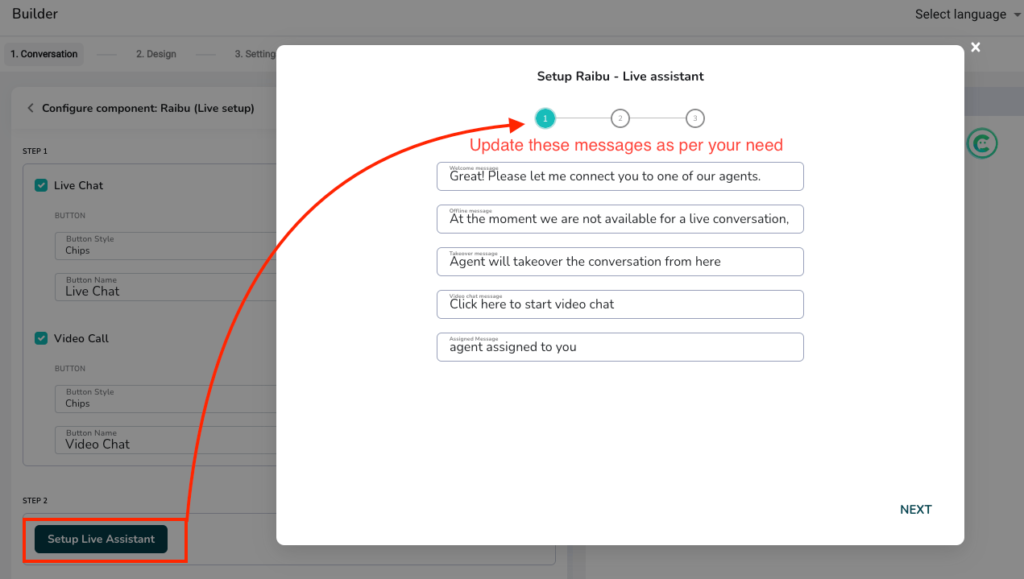
- Now Click Next, in this step we will assign the agent to the chat interface so they can start getting the incoming notifications for Live Chat, Video Chat, and Chat Initiated
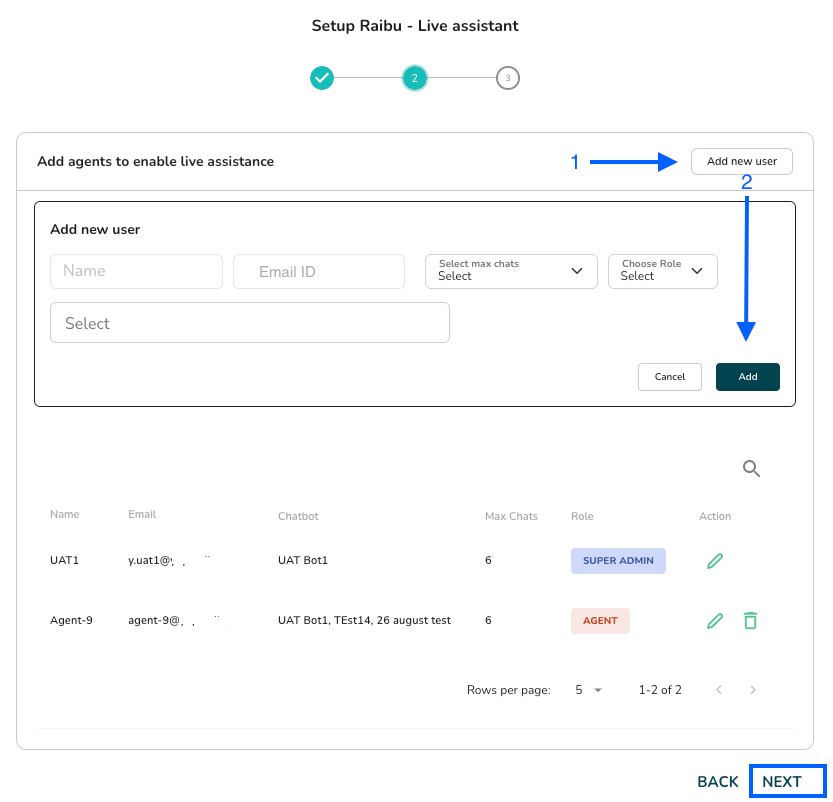
- Click on the button “Add new user”, this will show some fields to enter the agent details
- Enter the required details
- Name: Agent Name
- Email: Agent email, same will be used to send the credentials to login
- Max Chats: Number of maximum chat conversations the agent can have parallel
- Role: Use ‘Agent’ to only give access to Agent Dashboard. Or Use ‘Admin’ to give access to the complete product
- Select Chat interface: Select a chat interface to assign to an agent. You can assign multiple interfaces where an agent needs to be assigned. If the agent is already assigned to another interface, you can see it here.
- Click on the button ‘Add’, this will assign the new agent to the chat interface.
- It is also possible to delete or edit existing agents using pencil and trash icons in front of each record
- Click ‘Next’, in this step we will set up the offline form. The offline form is displayed if the Agent is offline or does not accept the incoming request. Provided, the offline form needs to be activated. If not active, the chat flow will continue to show the next component to visitors.

- Click the button ‘Finish’ this will save the settings for “Live Assistant”
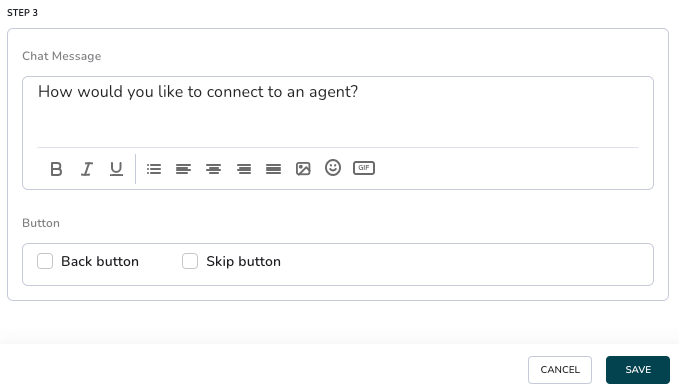
Step 3: Chat Message
- Write your own message to show the visitor
- Additionally, you can show buttons ‘Skip, and ‘back’
- Finally, save the component settings by pressing the ‘Save’ button