Let’s start building a chat interface!
- After creating your account, you’ll land on the application dashboard where you can create a new chat interface. Refer screenshot below to continue.
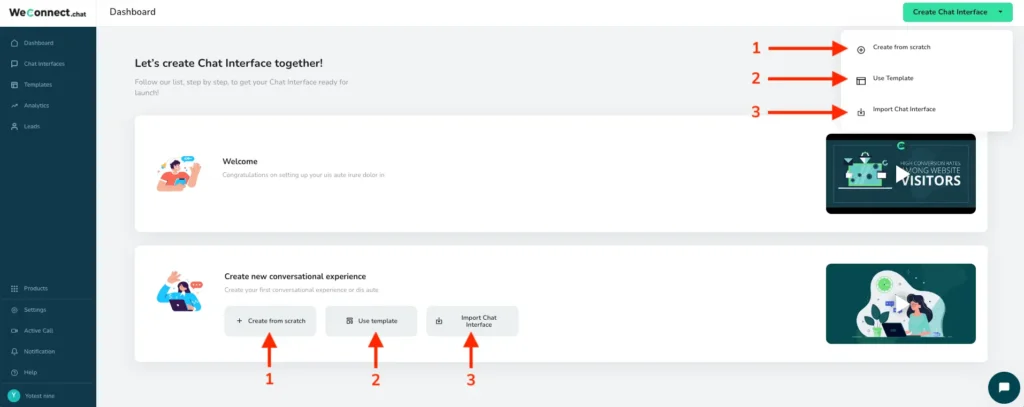
- There are three ways to create your new chat interface
- Create from Scratch
- Click on “create from scratch”
- Name your chat interface as “Demand Generation Bot”. (We are using this as an example you can create for any use case as per your need)
- Select language “English” for your chat interface. We will cover Multi-lingual topic in more detail later

- Click on button “Create and Next”
- After creating your first chat interface, you’ll be transferred to our interactive step by step Builder.
- Refer section “Using Builder” later in this page.
- Use existing templates
- Click on “Use Template“
- You will see list of readymade templates for popular use cases
- Click on “Preview” to see the existing flow designed for the template use case
- If you like the flow, click on “Use Template”
- After clicking “Use template”, you’ll be transferred to our interactive step by step Builder.
- Refer section “Using Builder” later in this page.
- Import existing chat interface
- Click on “Import Chat interface“
- You will get file explorer to select a “JSON” file of existing chat interface
- You need to export any other chat interface before using the import option
- After successfully selecting the “JSON” file, you’ll be transferred to our interactive step by step Builder.
- Refer section “Using Builder” later in this page.
Using Builder
WeConnect.chat platform is powered to take care of all complexities in creating a chat interface. With no-code interactive step by step chat builder, it’s get very easy to deliver great conversational experience to your audience.
- Get Familiar with builder screen

- Start building the flow by using “Chat component selector”. This will show a popup with list of all available components to use for your conversation flow.
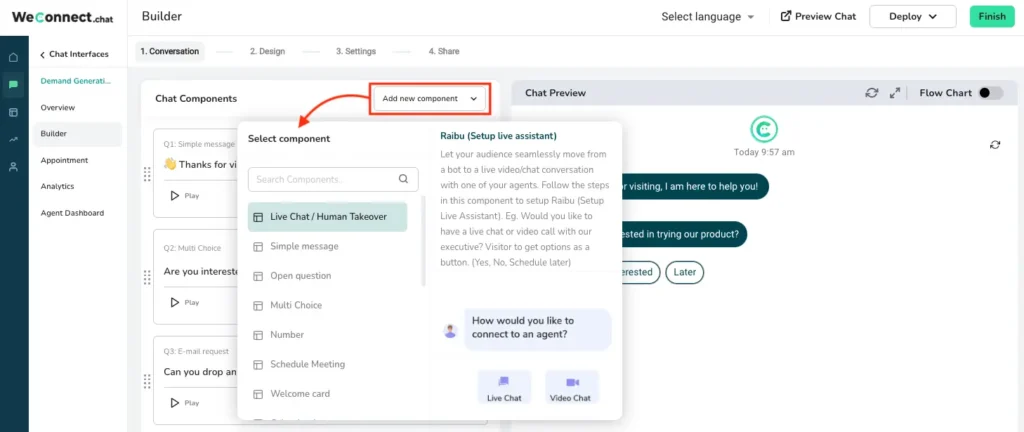
- Select any component from list to start building
- For our flow lets start with greeting message so we will use component “Simple Message”
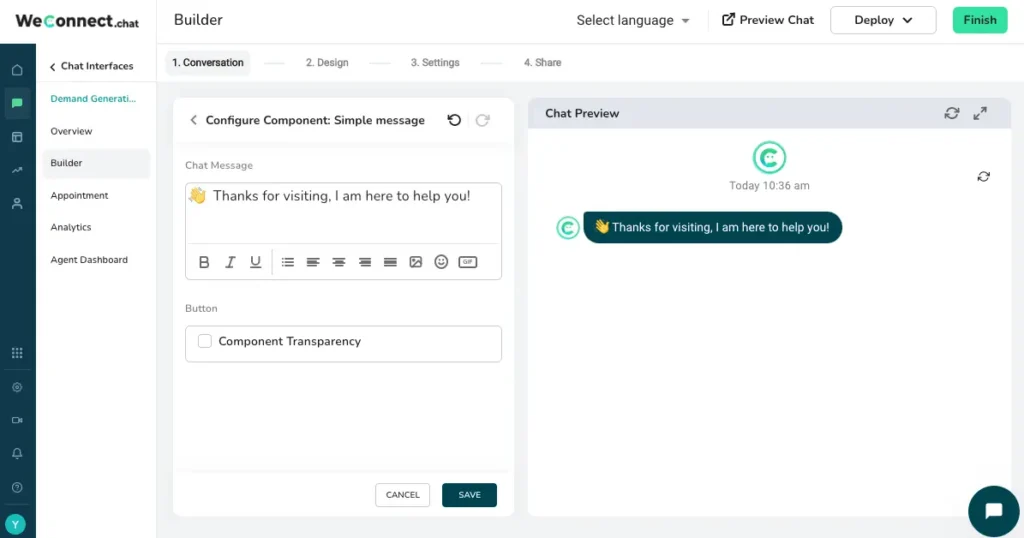
- Type the message you want to show in chat as a greeting. Apply required styling, emoji. You can also use images and GIF’s to greet your visitors.
- Lets type “Thanks for visiting, I am here to help you! ” Click on Save.
- Next component, lets ask the interest, so we will use component “Multiple choice”
- Let’s ask “Are you interested in trying our product?” Add choices and Save.
- Choice 1: “Yes, I am interested”
- Choice 2: “Later”

- Next component, lets grab the email to get the lead to follow
- Use email component, message “Can you drop an email so we can share you product updates?”
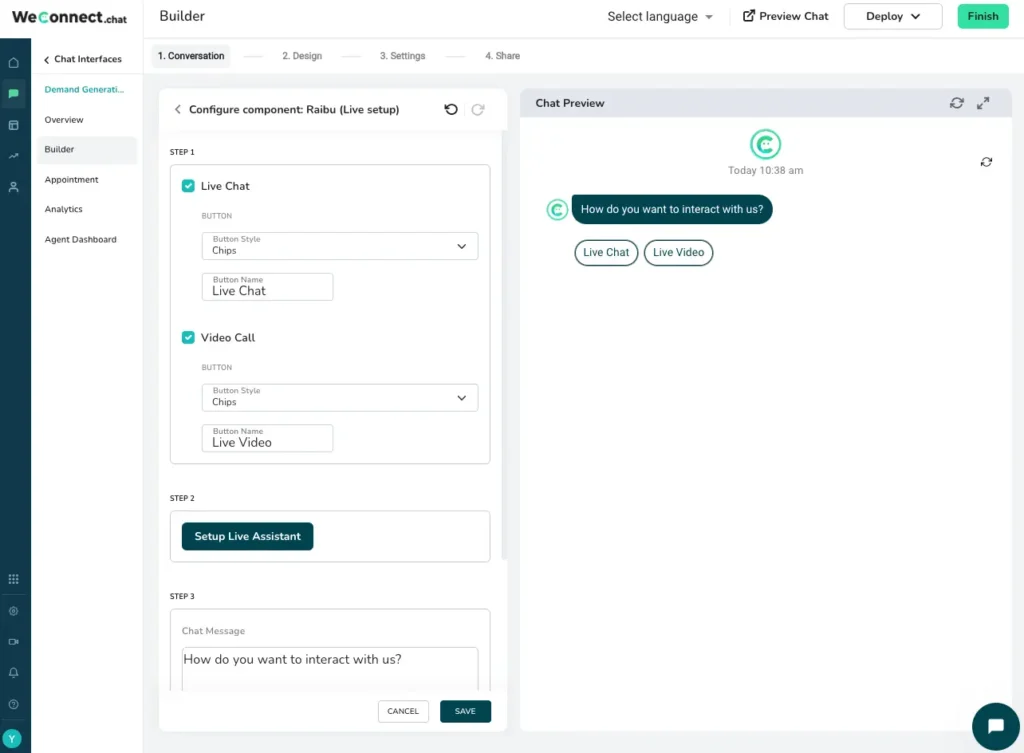
- Further we can offer an instant live chat or Video chat if visitor is interested by selecting Choice 1. To support this we need to add next component “Live Chat / Human takeover”
- Use message “How do you want to interact with us?”
- Choice 1: “Live Chat”
- Choice 2: “Live Video”
- Finally we can ask to rate a conversation using Rating component
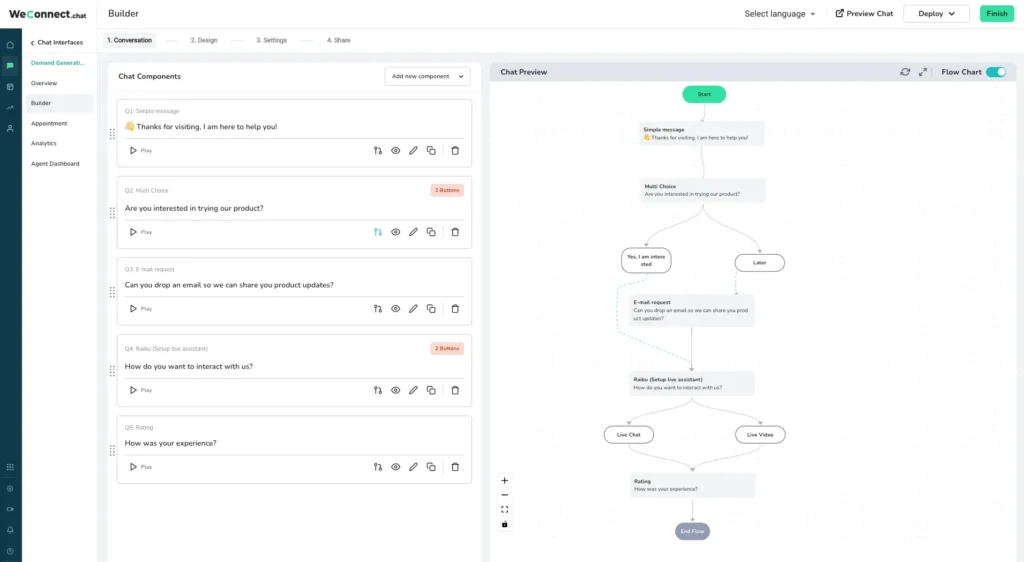
- Now our chat flow is ready and we can deploy this on any website.
- Refer below screenshot to see how the builder screen will look for this chat interface example
- You can drag and drop the components from list and shuffle the sequence of component, just use the drag handle icon given on left side of each component in the flow